
Universal Render Pipeline Lit Materials in Unity
Creating various materials in Unity can be a daunting topic, considering the complexity of various workflows and shader techniques that everyone is talking about. However the good thing is, as expectations and complexity in game development have increased, the tooling that we use to achieve good results has also gotten better. Increasingly, game engines come packed with optimised materials to create various surfaces out of the box.
Unity supports multiple pipelines to render graphics for games, each pipeline having their pros and cons, some being suited better for mobile games for example, others being more general options. Unity's Universal Render Pipeline (URP) is a modern standard for gaming graphics of current generation on most platforms. It has wide support for features and is as optimised as can be, given its large feature set.
In this article we will be looking at how to setup a Lit Material (out of the box in Unity's URP), which is a material that you can apply to various surfaces in your game to have them react to lighting from the environment using URP's default lighting features.
The Setup: Nothing better to test materials than a plain white ball with a light
To get started, we create a new Scene in Unity and add a simple Directional Light. Then we create an empty game object, and add the following two components to it:
1. Mesh Filter - select Sphere in the Mesh Property of this component
2. Mesh Renderer - select any material for testing or create a new Material in Project window and drag and drop it to assign it to the Material Property of this component
Make sure whichever material you choose, the Shader property on that Material is set to "Universal Render Pipeline/Lit".
Base Map aka Color / Albedo Map
Side Note On The Concept of Color Channels of Pictures
Each image is composed of one or many Channels. These Channels contain information for each pixel of this image. For example, a simple non transparent image has 3 channels - Red, Green, Blue. Transparent images have a 4th channel called the alpha channel. When a picture only has 1 channel, it does not have sufficient information to tell what color each pixel should be, because color inherently required 3 numbers (Red, Green, Blue). So a single channel image is visualised as a Grey Scale image, where each pixel can only tell how dark or light (grey) it is. For all of the images with RGB channels that have a grey scale filter on them, the creator should keep in mind they could have had the same amount of information by using 66% less space if they had used a single channel grey scale image instead.
The setup is good and all, but now we want to add some color. For this purpose, we create a new 512 x 512 PNG with white background. The reason games use square sized images is because they are easier to compress and retain more information when compressed, so a better quality image can be stored in a smaller space. For this step you can use any image manipulation software such as Gimp (open source) or Adobe Photoshop.
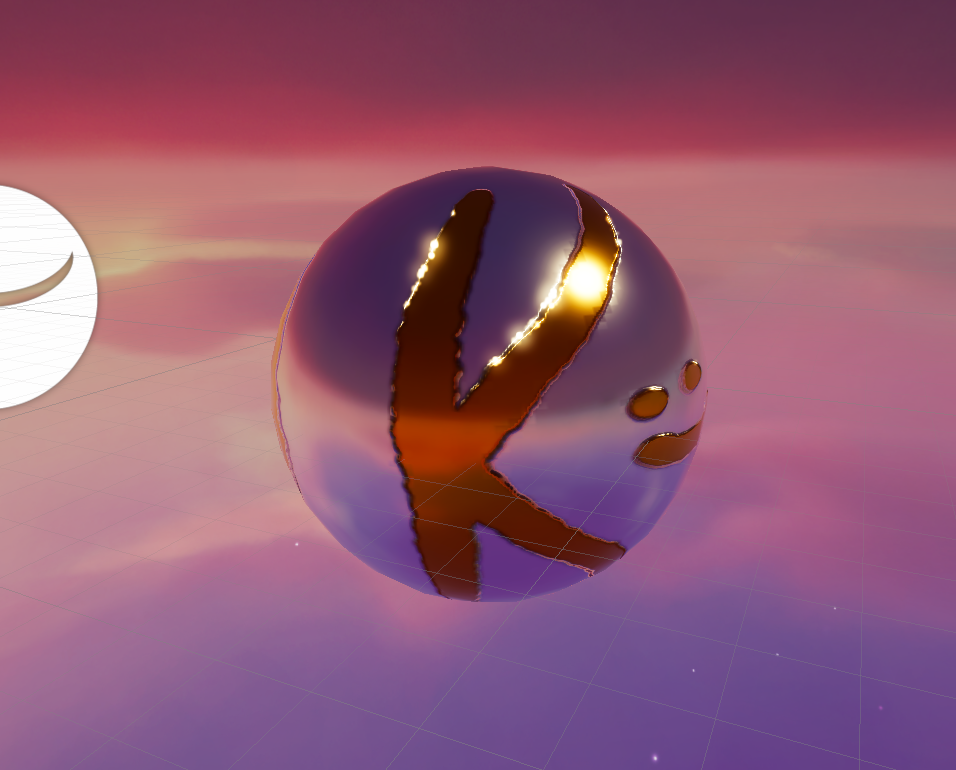
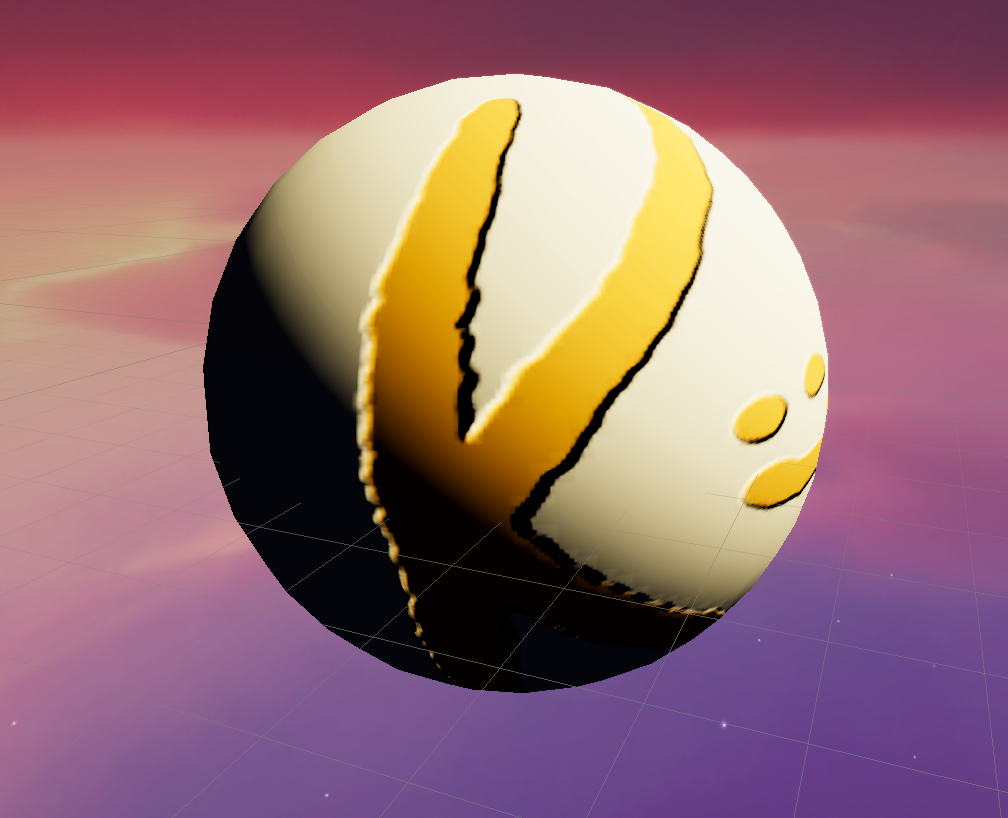
Put some paint on it, export it as a regular PNG with the 3 usual (RGB) color channels. Then open the Unity Editor, navigate to the file and drag-drop it onto the "Base Map" property of your test material. The result should look something like this.
| Base Map | Result |
|---|---|
 |
 |
As you can probably see, the Base Map property provides color information pixel by pixel (or maps the image) to the surface that you have applied the Material on to. You should be able to rotate the ball around, and see that we are on the K and smiley side of the image, the back side will contain a giant O, pulling information from the first half of the provided Base Map.
Height Map
A height map is a very similar image to the base color map, except the height map is a grey scale image. It tells the material which pixels are raised vertically above the surface (lighter, whiter pixels) and which pixels are closer to the surface (darker, blacker pixels). For our demonstration we can create a simple height map using basic color filters. First we desaturate the image completely, then we invert the colors, and then we export it as a grey scale single channel image. You can do this easily in Gimp or Adobe Photoshop.
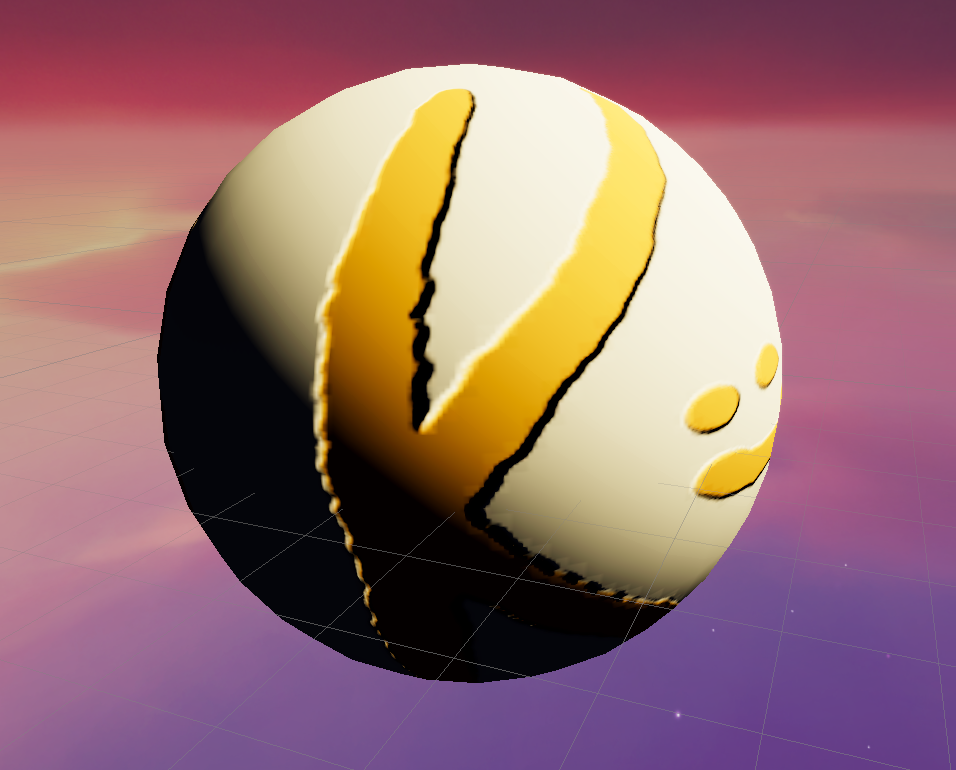
Drag and drop this exported height image onto the "Height Map" property of the material and rotate the ball around to see the subtle extrusion of pixels which are facing at odd angles from the camera.
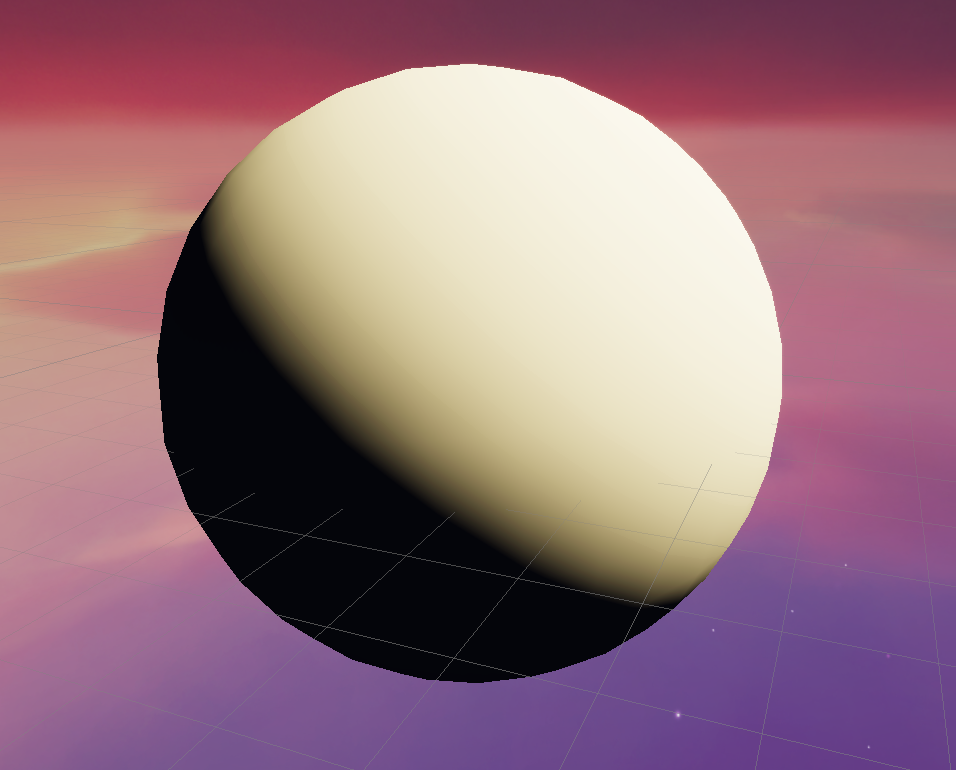
| Without HeightMap | With HeightMap |
|---|---|
 |
 |
If you play with the settings enough, notice that a bar appears next to the Height Map property when you assign an image to it. That bar controls how strongly the pixels will be extruded, and if you drag the value all the way to the right side, you might notice something weird. Unity seems to be drawing the texture twice, once before the height is applied and then once again with the height value applied. This is a limitation of the URP Lit Shader implementation. It happens because when Unity applies the Height Map information, it extrudes the pixels, but still draws the initial Base Map at its fixed place as if it were drawn initially. For better accuracy on larger values of height, it is better to create a custom Shader Graph with a "Parallax Occlusion Map" node and offset the Color Map UV coordinates using the height map.
Normal Map
A Normal Map tells the material how should parts of the surface react to lighting. Some parts get occluded due to roughness of the surface, and depending on the camera angle other parts should be shining. We can create a simple Normal Map using basic filters in Gimp or Photoshop, but that technique is only for simple cases.
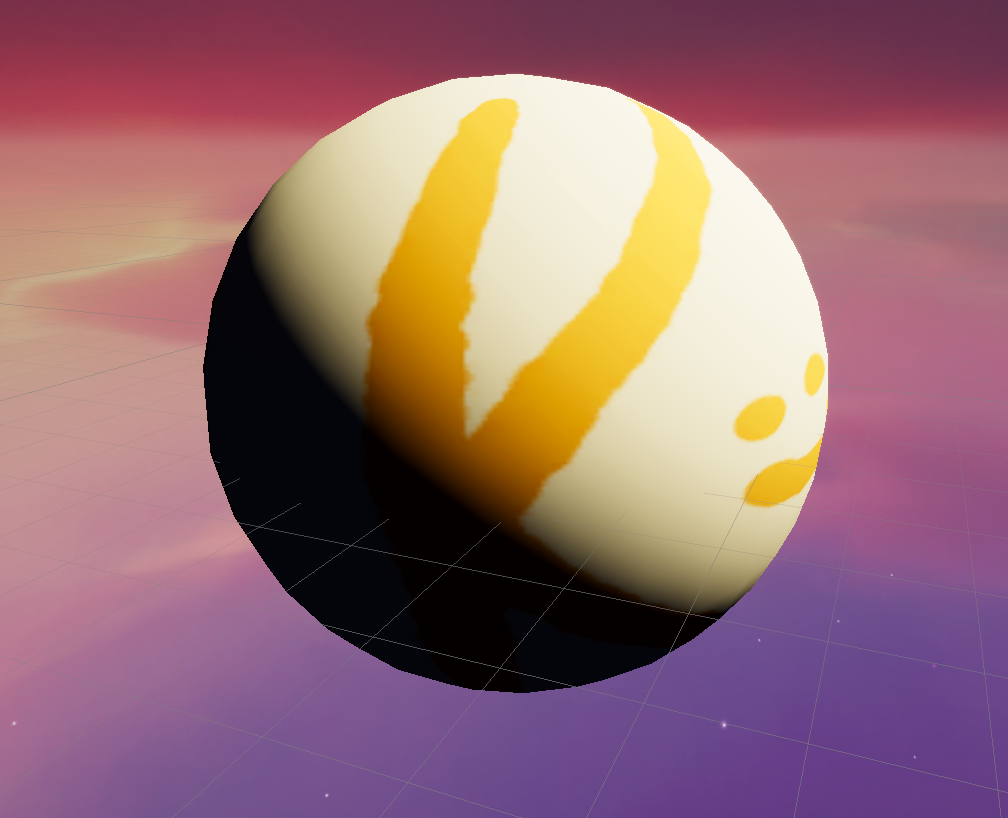
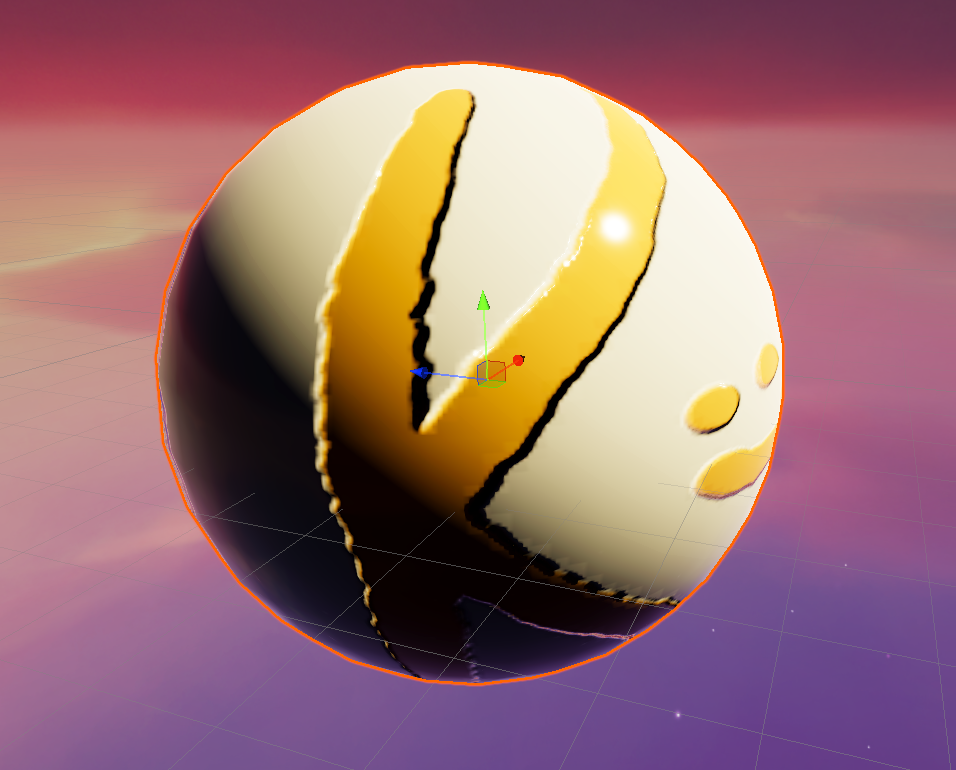
To create a simple normal map filter, start with the Color (or Base) Map, completely de-saturating the color map, then apply the normal map filter. In Gimp this can be found under Filters > Generic > Normal Map. In Photoshop you might have to install an add on depending on your version. Then export this as a regular PNG with RGB Channels. Drag and drop it into the Normal Map property of your material. Once you apply it, Unity will say that the image import settings is not set to "Normal Map" and provide a convenient "Fix Now" button for you to click on. Make sure you click that.
| Normal Map | With Normal Map applied |
|---|---|
 |
 |
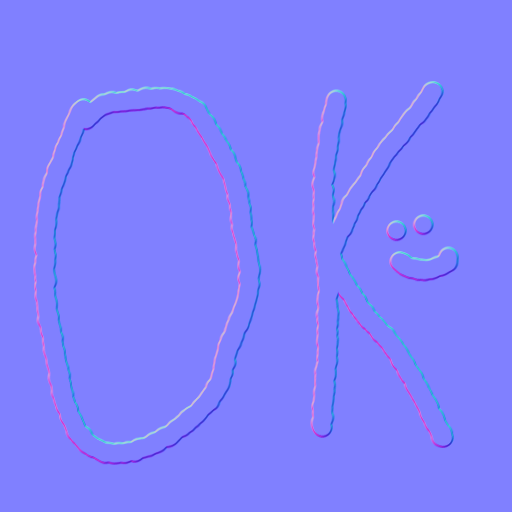
A proper dedicated Normal Map is created by taking three pictures of a surface and combining them into a single image. The surface is lit only by a single light source (making sure every thing else is completely black) from the Left, Top and Front. Then these three pictures are grey scaled, and put into the Red, Green and Blue channels of the normal map respectively. This is why the Normal Map appears mostly blue, because nearly all of the pixels of the surface are lit when light is thrown on it from the front side. However, a game engine can use this information and use it to reconstruct how a particular pixel should look like if light from any given angle is thrown at it, by decomposing the direction of incoming light into the Left, Top and Front directions and using appropriate channels from the Normal Map to calculate how bright a particular pixels should be.
I love Vector Math, but perhaps it is not for everyone 😄.
Metallic Map
Now let us look at the Metallic Map property. You can slide it fully to the right, making its value equal to 1, to see what it looks like. In the lighting model that Unity's URP implements, a metallic surface only contributes a very small part of its own color, but most of its color comes from the reflections from the surroundings. For this we first need to need to have a basic reflection setup. We can do this by creating a Reflection Probe and adding it to our scene. A reflection probe is like a spherical camera, it captures its surroundings (once during design time or continuously at runtime), and the URP Lit material can then use the information provided by this Reflection Probe to color the metallic surface correctly.
Add a Reflection Probe by right clicking the Scene hierarchy, choosing Light > Reflection Probe. Select the added Reflection Probe and click "Bake" for it to capture at least one image of the surrounding. Then make sure the Metallic Map property of the test material is set to 1 for the full difference.
| Fully Metallic Surface without Reflection Probe | Fully Metallic Surface with Reflection Probe |
|---|---|
 |
 |
We will be looking at how to use an image to provide a per-pixel metallic value to the surface after we look at the Smoothness Map.
Smoothness Map
Smoothness tells how the shine of a surface should be. Should it be scattered, a faint glaze, or a very tight sheen like glint? When Smoothness is equal to 1, it means light is getting reflected from the surface as if the surface was perfectly smooth and plane, making it almost mirror like for shininess (or reflections both). You might think that the shine has disappeared when smoothness is zero, but that is not the case. the shine disappears when metallic is zero. When smoothness is zero, the shine is simply spread out, like a roughened cue ball or a surface with lots of micro-scratches that has seen a lot of mileage.
| Smoothness = 0 | Smoothness = 1 |
|---|---|
 |
 |
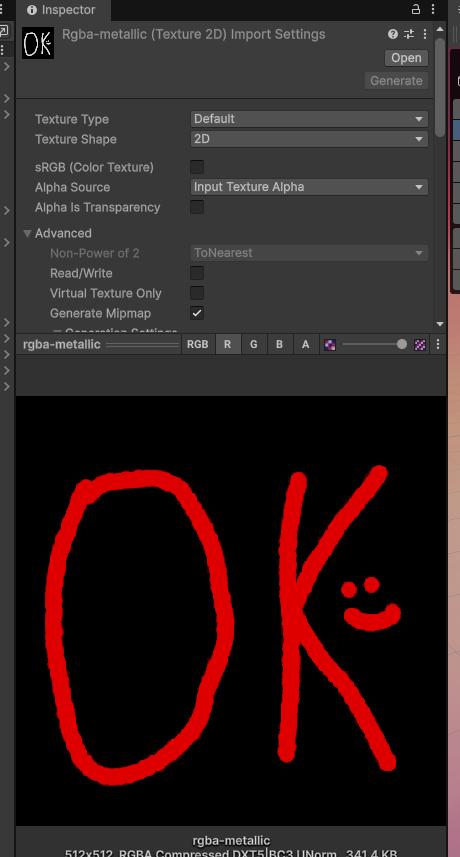
Now Unity uses a clever trick to minimise the file sizes for the Metallic and Smoothness Map by combining them into one. Since both the properties are single values per pixel, each can be represented by a single channel grey scale image. In order to avoid loading two images, it rolls the Smoothness Map into the alpha Channel of the Metallic Map.
We can create a simple Metallic Map to demonstrate this idea. First take the Base Map, fully desaturate it and save it as a gray scale single channel image. Then add an alpha channel to it and add some other values to that channel. Then save this as a 2 channel PNG image, a gray scale image with an alpha channel.
In Gimp this can be done easily by desaturating the Base Map, then select Image > Mode > Grey Scale. This converts a RGB image into a single channel grey scale image. Then select Layer > Transparency > Add Alpha Channel. Then right-click your layer and select Add Alpha Mask. Paint the Smoothness onto the Layer Mask, and the Metallic onto the base layer itself. Then right-click the base layer and select Apply Alpha Mask. Then export this as PNG, and while exporting Make sure the option "Save Color Values From Transparent Pixels" is checked on.
Drag and drop this image into the Metallic Map property of the test material and make sure the "Source" value under Smoothness is set to Metallic Alpha. Also uncheck the "sRGB (Color Texture)" to off for the Metallic Map. The result should look something like this:
| Metallic Map Red Channel | The Metallic Map Alpha Channel | Result |
|---|---|---|
 |
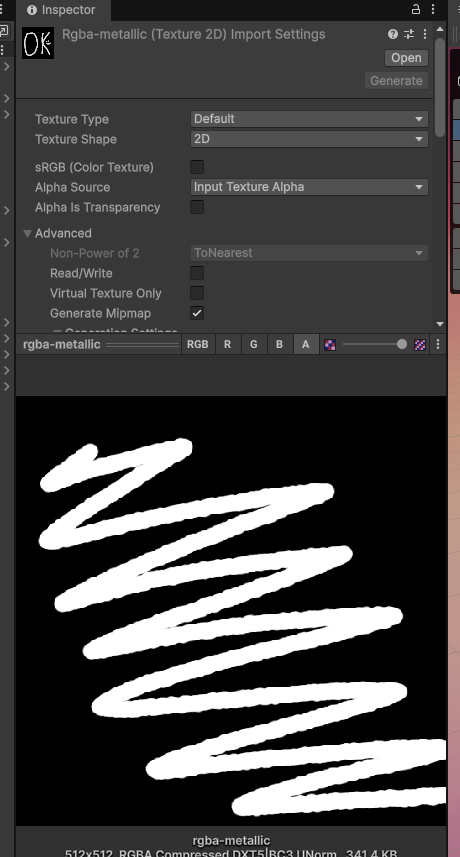 |
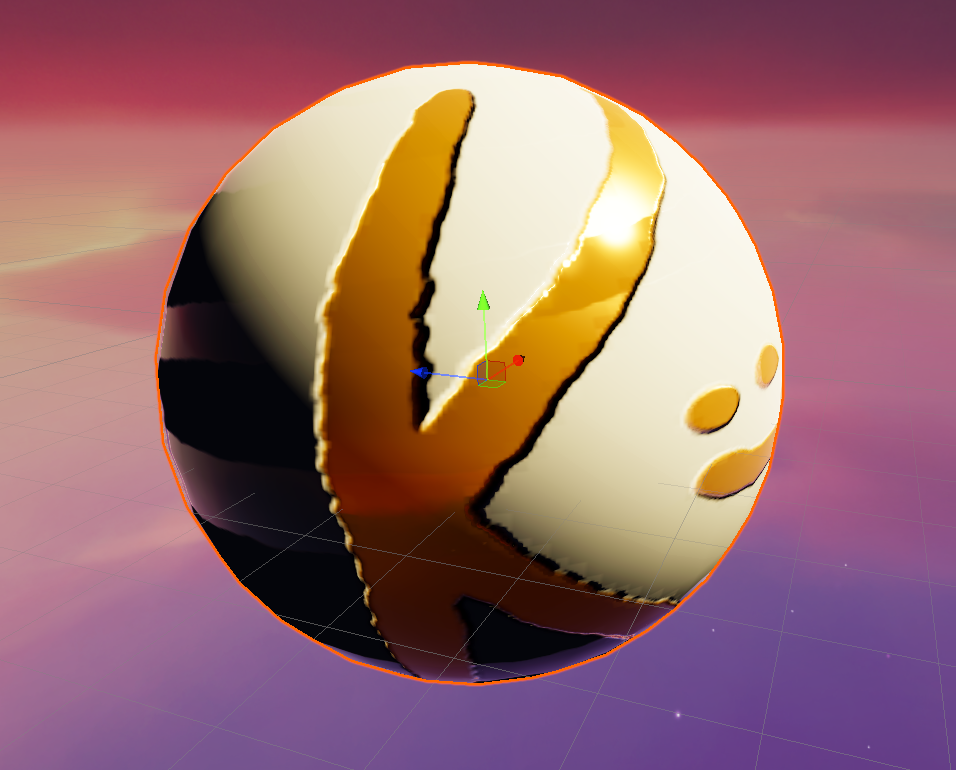 |
Conclusion
There are many more peculiarities to the world of materials, surfaces and shaders in games, especially when working with a general purpose game engine like Unity. Stay tuned for more such technical dive-ins!
Member discussion